Multi Widget Editor
The Multi Widget Editor (MWE) allows you to edit the properties of multiple widgets at once. It is invoked while in the Image Editor, either via the toolbar icon or the right click menu 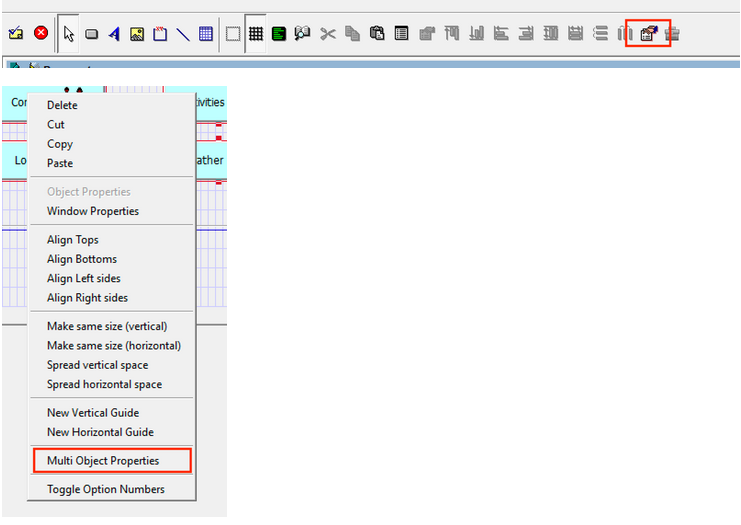 You may select one or more widgets before invoking MWE but it is not necessary to do so. Once invoked, you will see a display similar to this 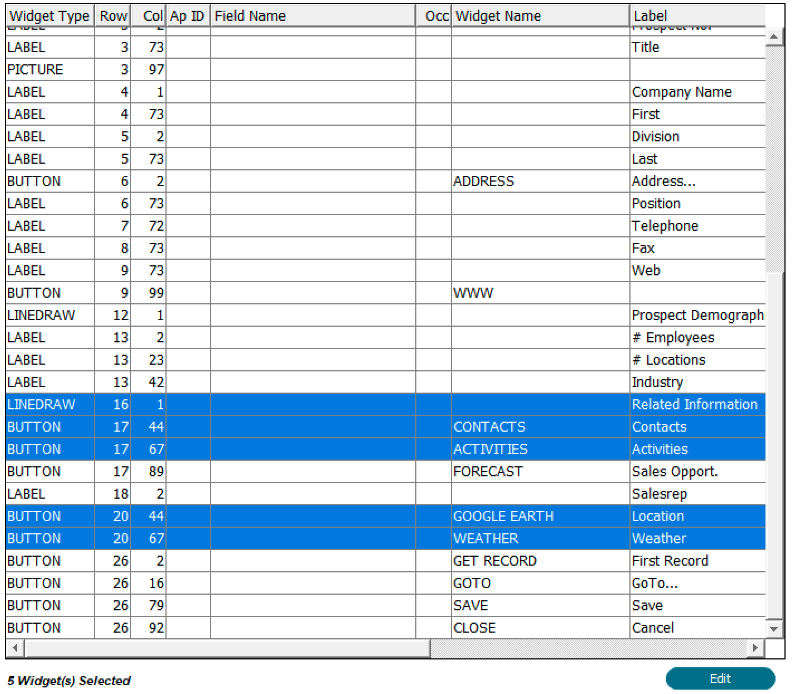 Any widgets you selected before invoking the MWE will be selected for you in the table. You can change your selection in the usual way, i.e. Control + Click to select additional widgets, Shift+Click to select a range, etc. You can also reorder the table by clicking the column heading. For example, you could group the widgets by type to get all the buttons together.
Note that if any items do not have a widget, one will be created with default values. Non-modifiable fields will get a LABEL widget, modifiable fields will get RAW TEXT, Date fields will get CLOCK/CALENDAR and so on.
To change widget properties, click the 'Edit' button. An Attribute table will appear beside the widget table: 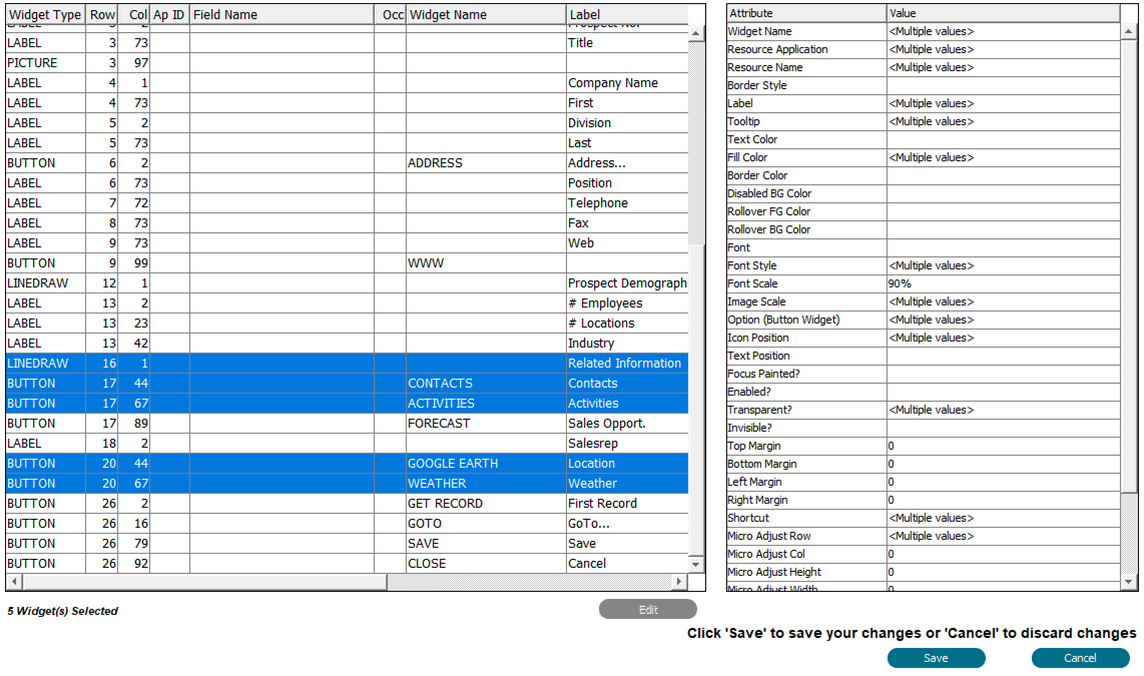 The list of Attributes will vary depending on which widgets you have selected. Beside each attribute is the value for the selected widgets. If the selected widgets have different values it will show . If a single value is shown then all selected widgets have that value.
As long as one widget has a particular attribute it will show in the attribute table. To change an attribute just double click it. A dialog box will appear where you can enter the new value to be applied to all widgets. The dialog box content will vary depending on which attribute you selected. For example, if you double clicked 'Font' you would get a Font chooser or if you double clicked 'Text Color' you would get a color chooser and so on.
After you have made the desired changes click 'Save', or click 'Cancel' to discard all your changes. The Attribute table will disappear and the widget table will be available for you to select additional widgets. You can repeat this process of selecting widgets and changing attributes as many times as necessary. Only attributes that are applicable to the individual widgets will be updated. For example, if you selected LINEDRAW (Box) and BUTTON widgets, Box Label Location would appear in the list of attributes and you could change it. Since buttons do not have a Box Label Location, that setting would be ignored when updating the button widget.
When you are finished click 'Save' one more time to update your image with the changes or click 'Cancel' to discard all changes. You still need to click 'Save' in the Image Editor to save your changes to the design files as usual. |